Showing posts with label Kitchen Tools. Show all posts

Tuesday, December 22, 2015

MINI HOLIDAY GIFT GUIDE: BIALETTI MOKA POT (AND TUTORIAL)


A few weeks ago, I thought to myself, "Should I work on a new holiday gift guide?" My answer was resounding "Nah" (as resounding as a "nah" can be), because I thought the 2014 holiday gift guide covered pretty much everything, especially with the suggestion of a labor-free staycation for mothers that I hope Mr Bee is considering.

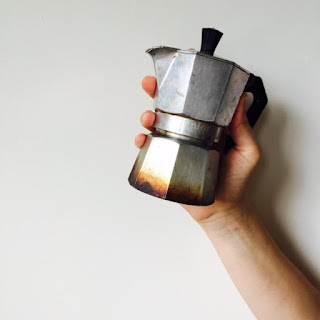
Then I remembered there's a product so pretty, so Italian, so dear to me, and so reasonably priced that I have to recommend it to you for this holiday season. I'm talking about the caffettiera, or moka pot, the wonderful contraption that gives you a wonderful, strong coffee in minutes right from your stovetop. Coffee made with a moka pot is similar to espresso in its dosage (roughly) and instantaneous kick, and it is served in an espresso cup, sometimes with one or two teaspoons of sugar and/or a dash of milk. I believe every Italian household owns a few moka pots in various sizes, and drinks moka coffee first thing in the morning, after lunch, and with friends when they drop in for a visit.

There are many beautiful moka designs from different brands, but my favorite is the aluminum Bialetti pot patented in 1933 by Alfonso Bialetti and carrying the classic logo of the "little guy with a mustache" that you can see on the right. (Now that I think about it, they could have found a more inventive name for an Italian mascot.)

Here is everything you need to know about your moka pot once you decide to gift it or in case you become a lucky giftee. Read on.

HOW TO BUY 

You can find Bialetti pots online and at many Italian specialty stores. For a beginner, I'd recommend to start small with a 1- or 3-cup moka pot (around $25 for the latter) and a packet of replacement gaskets ($3.80 on Amazon). I'd also recommend enriching your gift with a bag of ground coffee, ideally from Lavazza or Illy moka or espresso ground (but once you get addicted, Café Bustelo at CVS purchased at dawn will also do). If you're dealing with a coffee lover, I would visit your local coffee roaster and ask for a dark or medium roast ground a little finer than drip coffee but a little coarser than espresso. And in case you're dealing with someone very special, you could gift a set of espresso cups, too.

FIRST DAY WITH YOUR MOKA POT

A moka pot needs to be thoroughly cleaned before it can produce proper coffee. Wash the three main parts (see diagram below) with warm water ONLY, then run the pot with only water for 3-4 times to remove any protective residue. I know you don't know how to use it yet, but I guess you'll have to read the entire post.


MAKE MOKA COFFEE!

1. Fill the bottom container with filtered water up to the internal valve.


2. Insert the funnel and fill it with ground coffee. You can make a small pyramid here, but in any case, NEVER press the coffee. Remove any ground coffee on the filter rim.


3. Screw on the top container. No need to apply a ton of strength here, but do a decent job so your coffee doesn't come out from the sides.


4. Place the moka on a low heat until the coffee emerges and fills the top container. If you're in another room, you'll be alerted by your moka's happy gurgling. DO NOT leave the coffee boiling any longer: It will taste burnt and awful, and you run the risk of ruining the gasket.


5. Pour your coffee, doctor with sugar and/or milk (or sambuca, or grappa) if this is what you're into, and drink.


MAINTENANCE

Maintenance for a moka pot is very easy. Wash the three main parts of the moka pot after each use with warm water, never with soap or detergent. You can use a stiff plastic brush to remove stubborn residue. Leave the parts to dry on a rack. Done!

Every six months, or whenever necessary, disassemble the moka and wash each part thoroughly making sure the filter is clean and the gasket is clean AND still soft. Run water through the moka chimney and make sure the valve is clean. If the small metal piece sticking out from the valve doesn't pop in when pressed, it means that there's coffee residue that needs to be cleaned. To remove limescale buildup, fill the bottom container with water and a little vinegar or lemon juice and let it boil for 10 minutes or more.

Replace gasket and filter as necessary, usually when they have become irreparably dirty, hard, or when coffee starts to sputter or comes out in only in part.

To read a poignant reflection on the diverging attitudes towards coffee for Italians and Americans, read Slow Food/Fast Coffee.


Wednesday, July 22, 2015

11 ESSENTIAL ITALIAN KITCHEN TOOLS


What are the essential tools that would make your kitchen truly Italian? After months and months of pondering, I'm ready to present you with my final list. It is based mostly on my personal experience as an expat, especially from the first year in Mr Bee's house, where I would search every drawer and cabinet for these little gems before calling my family in tears. Here they are, in all their indispensable glory.

1. MOKA POT

Moka pot


In Italian, la caffettiera. This beautiful, beautiful object appears in many formats in every single Italian household. The moka pot is the best and quickest way to have a strong coffee (just a little less concentrated than regular espresso) any time of the day, and especially in the morning. Just fill the bottom half with water, insert the portafilter, add espresso-grind coffee, and screw on the top half. Place on the stove, and you'll have your coffee in minutes. And, unlike an espresso machine, a moka pot is completely portable and requires minimal maintenance—just rinse in hot water after each use. In my opinion and that of many others, Bialetti makes the best.


2. GAS COOKER TRIVET

Gas cooker support for moka pot
Add caption


In Italian, la crocetta. This is a godsend if you're using a smaller moka pot on a gas cooker. It's a support to keep the moka pot in place on larger gas burners. It usually starts out much shinier than the one in the picture, which is by now well oxidated.


3. FINE CHEESE GRATER

Cheese server for Parmigiano


In Italian, la grattugia. If you need to grate Parmigiano or Pecorino for your pasta—and it's completely acceptable to do it right at the table before you eat—you need this. The small holes and the rounded surface allows you to grate the cheese in fine and soft ribbons, so that it starts melting immediately on your dish in all its salty and creamy goodness. The large-holed cheese grater that you use to shred cheese is not popular in Italy, where I believe it's only used for vegetables. I use this small grater from Ikea, but in Italy people use a larger one.


4. CHEESE SERVER


In Italian, la formaggiera. When you're not grating cheese straight on your plate, you can use a cheese server, great for formal dinners but definitely used everyday on the traditional Italian table. It needs to be filled with fresh Parmigiano, and people pass it along and sprinkle one or two teaspoons of cheese on their pasta. When I was younger, my grandparents would ask me to grate a small mountain of cheese on a plate and then pour it in the server in time for lunch. This one is from Alessi.


5. CRUMB SWEEPER


In Italian, il raccoglibriciole. In my opinion, nothing else encapsulates Italy more than this plastic brush designed to clean up your tablecloth from breadcrumbs after a meal. The popularity of this object means two things: that Italians like to eat at a table covered with proper tablecloth, and that they are going to have bread with whatever they're eating. After over ten years in the United States, I wonder whether Italians are keeping up with their social eating and bread dependency. I really hope so.


6. PASTA MACHINE

Pasta or pastry cutter

In Italian, la macchina per la pasta. I'm positive that Italians today do not make homemade pasta as often as their grandparents. However, this is a beautiful object that everybody who loves cooking should have. There are few things more satisfying than cranking your pasta machine on a floured table (and now that I have fresh pasta on my mind, I can't really think of any). Mine is a gorgeous red Imperia. Ask for one for you birthday.


7. PASTA CUTTER


In Italian, la rotella. If you own a pasta machine, then you cannot forgo the pasta cutter. It's perfect to cut ravioli, and of course you can also use it as pastry cutter for all your pies and quiches. Mine belonged to my maternal grandmother, and it's light, sturdy, and precise. I also love the sweet rattling sound it makes as it cuts through the dough. So satisfying.


8. DOUBLE-HANDLE MEZZALUNA


potato ricer

In Italian, mezzaluna ("half moon"). I was genuinely surprised that this was not a staple of American kitchens, too. It's perfect to chop herbs and nuts. Just rock it side to side, occasionally sweeping everything back to center for another round of chopping. You can object that a knife would be quicker, but that's true only if you have good knife skills (I don't). Plus, you'd be really missing out on all the fun, and I can't condone that.


9. RICER


In Italian, lo schiacciapatate. This is basically a gigantic garlic press for vegetables, and especially potatoes, that gives you the creamiest, fluffiest ribbons of potato you can ever dream of. Use a ricer to make puré, the (slightly) lighter and more elegant version of mashed potatoes, but also potato gnocchi, and my favorite fancy ice-cream creation: spaghetti ice cream.


10. CITRUS SQUEEZER


soup plate, use in Italy for the first course

In Italian, lo spremiagrumi. In winter, mothers all over Italy spend the best part of their day squeezing juicy Sicilian oranges for their little ones, because you know, vitamin C. And let me tell you, you really get to respect your mother when you see her exerting tremendous force on a tiny squeezer to obtain even the last drop of orange for your morning breakfast. Small and easy to clean, it's an Italian must-have.


11. SOUP PLATES


In Italian, i piatti fondi. Don't be fooled by their English name, the piatto fondo is not only for soups. Rather, it is the plate where the first course, or primo, is served. On a classic Italian table, you eat your pasta, soup, or rice dish on the soup plate, and then your second course on a dinner plate. I was dumbfounded when I came to the United States and discovered you only use dinner plates for pasta. The soup plate is the perfect vessel so that your primo feels neither too crudely exposed nor too infantilized. (Makes sense, right?) Luckily, my MIL gifted me a set of 6 soup plates so I can feel a little better when I get a little homesick and make myself a megaportion of ravioli.

Wednesday, November 19, 2014

PUMPKIN RAVIOLI (MADE WITH CHESTNUT FLOUR)

Image of plated chestnut-flour pumpkin ravioli.
  
Here I am with a recipe that has been wiggling in my brain for months: pumpkin ravioli made with chestnut flour. I LOVE chestnut flour. I bought it for the first time a few years ago from The Italian Store, and I've used a few times to make linguine and crepes with great success. Chestnut flour has a mellow, sweet, nutty flavor that is subtle and unexpected. It produces a pasta dough that is tougher than the usual dough for egg pasta, but it also cooks very well and maintains a good bite, so it's worth every extra pound of pressure you need to apply to your rolling pin and pasta maker.

The pumpkin/chestnut idea became suddenly urgent when last month, on a whim, I bought a peanut pumpkin that a DeadChef follower and cooking expert later defined as "the MOST delicious pumpkin ever for pies and everything else". This is the kind of comment that gets me really excited, of course. Unfortunately, days passed and I couldn't get to my ravioli thanks (really, THANK YOU) to a string of unforeseen, disheartening sh*t, including Microbee (the youngest) getting sick and throwing the entire family into a weeklong nightmare of tears, snot, insomnia, and recrimination. When I finally judged myself ready for my peanut pumpkin, I realized with great horror that it had rotted from the inside and was completely inedible. To make things worse, my farmer's market was not selling them anymore. Which brings me to my new motto:

Image of motto, "Good things rot for those who wait".

I had to give up on the best pumpkin in the world, but I wasn't giving up on my ravioli vision.
So I immediately drove back to my farmer's market and purchased another pumpkin. This time, I chose a Long Island Cheese Pumpkin, because if I couldn't have the best, then I wanted another with a similarly evocative name. The Cheese Pumpkin didn't disappoint—well, it did disappoint in not tasting like actual cheese, but I knew the name was due to its shape—it is a more velvety and sweet version of a butternut squash, and decidedly more delicious. 

While the pumpkin was roasting in the oven, I worked on the chestnut-flour pasta dough, and then rolled it out, stretched it, filled it, and cut it despite the slightly unnerving attentions of my very defiant and mechanically-obsessed Minibee (the oldest).
Step-by-step ravioli making. Image of thinly-rolled pasta dough, dough with bits of filling, hands pressing dough on filling, hand using pasta cutter to shape ravioli.
The pasta cutter in the last pic belonged to my maternal grandma. It's my amulet.

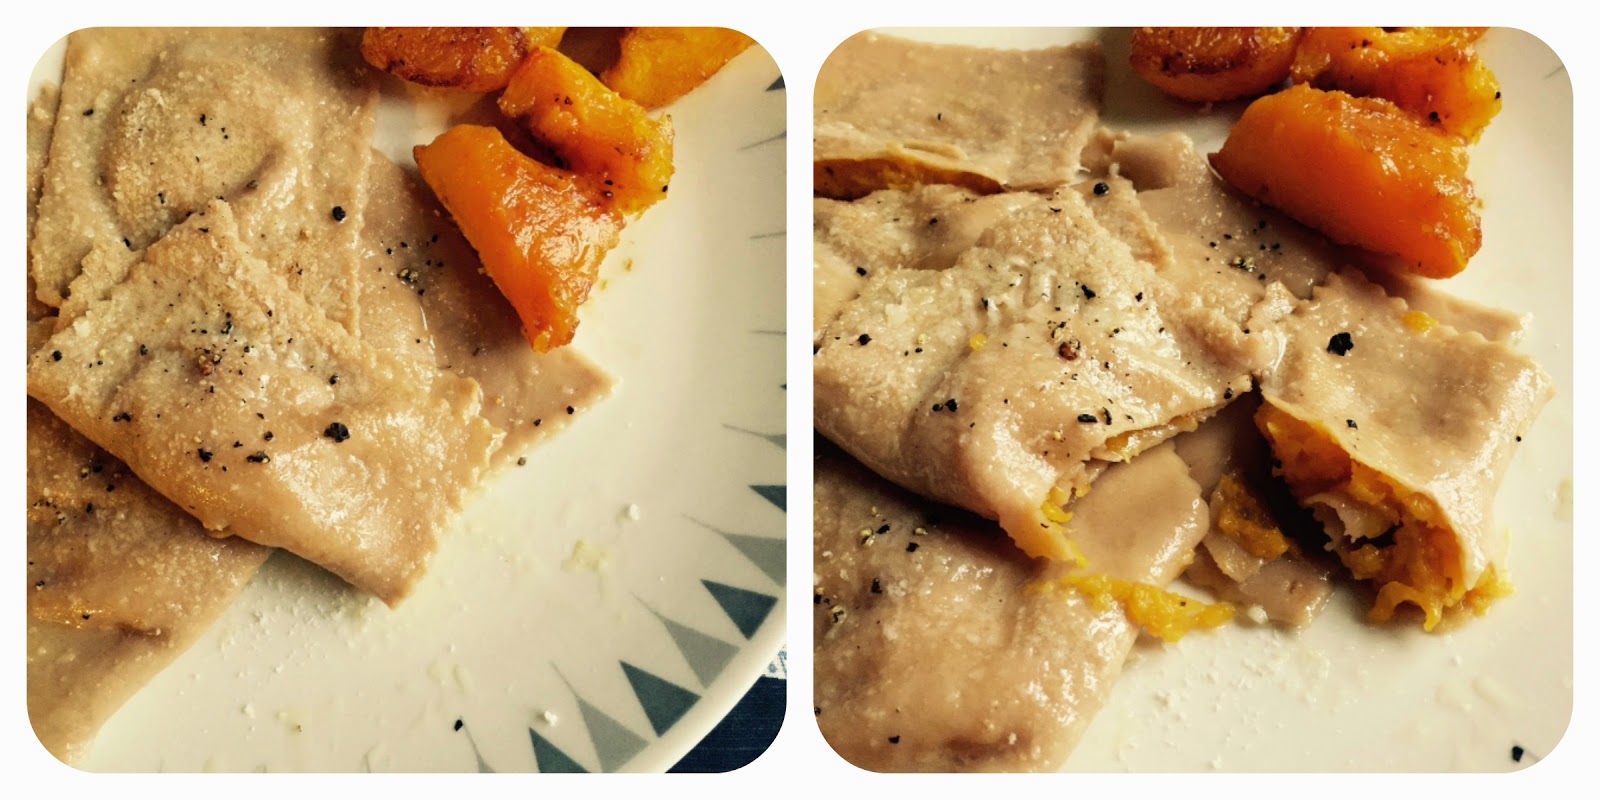
I'm happy to report, the final ravioli were a total delight, sweet and creamy and absolutely perfect for fall. We served them topped with melted butter, grated Parmigiano, and a little black pepper, and added some leftover cheese pumpkin cubes aside. It took a whole afternoon with the constant sabotaging by my kids, but when there's a pot of buttery ravioli at the end of the parenting tunnel, nothing can stop me.

Two close-up of chestnut pumpkin ravioli. Second image shows open ravioli with filling oozing out.

PUMPKIN RAVIOLI 

(MADE WITH CHESTNUT FLOUR)


for the filling:

2C roasted pumpkin (with EVOO and kosher salt)
1/2C grated Parmigiano Reggiano
freshly ground black pepper

for the pasta:
1C chestnut flour

1C unbleached all-purpose flour
a pinch of salt
1 tbsp EVOO
2 eggs
1 egg white (for sealing the ravioli)

finish:
2 tbsp unsalted butter
1/4C grated Parmigiano
freshly ground black pepper

MAKE THE FILLING
  • Peel and cut your pumpkin in small pieces. Drizzle with oil, sprinkle with salt and roast in a 375F oven until fork tender. Let cool.
  • Mash the pumpkin with a potato masher if you like to keep some of the original texture (and heartiness), otherwise, puree until smooth in a food processor. 
  • Stir in the Parmigiano and the pepper.

MAKE THE PASTA DOUGH
  • Mix the two flours in a bowl and stir in the salt and EVOO.
  • Add the two eggs and mix first with a fork and then, when the dough starts to come together, with your hands, until you obtain a compact, elastic dough that is not sticky. If the dough is still dry and crumbly, sprinkle with water until you reach the desired consistency.
  • Cover and let rest of 30 minutes.

MAKE THE RAVIOLI
  • Roll out the dough with a rolling pin or with a pasta machine until very thin. If you never used a pasta machine before but want to start now, check out these instructions.
  • My ravioli were 3X3'', because I wanted to have a little filling in the center and some room for the pasta itself to breathe (you get to enjoy the chestnut flavor more). If you want the same, cut the pasta in 3'' wide strips and place a heaping teaspoon of filling every 3''.
  • Brush with egg white (mixed with a couple tablespoons of water) along the edges and in between the filling heaps.
  • Place another strip of pasta on top and cut the edges of each piece with a pasta cutter.
  • Place the finished ravioli on a floured kitchen towel and sprinkle with flour.

COOK&SERVE
  • Melt butter in a nonstick pan.
  • Cook the ravioli in gently boiling water for 2–3 minutes. Be delicate: they are.
  • Serve the ravioli, about 5 per portion, topped with melted butter, black pepper, and Parmigiano.

Tuesday, February 11, 2014

I STILL NEED MORE MACKEREL

Some of you might remember my post declaring my love for mackerel. (You don't? It's here.) It's a kind of a "romantic abnormality", if you remember the best Simpsons episode ever, "A Fish Called Selma". Well, imagine how happy I was when I went to Ikea last Sunday and found their new Mackerel decor. I found a tray and napkins.

Mackerel Tray

I couldn't stay much and see whether other items now sport my favorite fish. Maybe the Poang chair? If I may, I'd like to suggest shower curtains, dish towels, ceiling lamp, and a massive rug.

Mackerel Napkins