Wednesday, February 25, 2015

MATCHA CHOCOLATE CAKE

Detail of matcha chocolate cake dusted in cocoa powder and powdered sugar

My oldest son, MiniBee, turned four (!) a couple of weeks ago, an event that was celebrated with friends and with a deluge of Venice Carnival sweets and a two-batch Pandecocco coconut cake. A couple of days later, we also had a smaller family celebration that required yet another birthday cake. As any parent knows, children are only slightly more traditionalistic than the most conservative old-Europe grandparent, so there was no way MiniBee could hear the words "happy birthday" without blowing on proper candles on a proper cake. I needed a recipe, and I remembered one for Chocolate Matcha Bundt Cake from Bakerella (of the infamous cake pops) that had been sitting patiently on my Evernote for at least three years. I love matcha and I enjoyed it in many versions on my 2009 food pilgrimage to Japan, and I especially love how it couples lusciously with chocolate. It all started when a friend gave me an assortment of fancy chocolates that contained a matcha-chocolate combination that was one of the highlights of my life as an eater.

Now, someone could argue that matcha is a risky choice for a preschooler's birthday cake, and I can definitely tell you that when MiniBee heard his birthday cake was made with TEA, he was not at all pleased. But, in rebuttal to any concerns and objections I have two points to make:

1. Children will eat any cake that's placed in front of them, especially when decorated with birthday candles.

2. It doesn't matter whose birthday is it: If I'm baking or buying a cake, I need to like it first.

The second point is actually a corollary of my favorite parenting rule:


Substitute "wear" with "eat" and "oxygen mask" with "damn cake" and you'll see what I mean.

But back to matcha. For the cake, I used some unsweetened matcha powder I bought at HMart. And since the party was attended only by five people, I decided against the Bundt format and made a simple layer cake instead, halving the ingredients and making a couple of variations (more egg, less sugar, and my trusted addition of plain yogurt to guarantee a moist texture). I also suspect the matcha-chocolate combination works best in a slimmer cake. What can I say? I think it's classier this way. And as someone who wears German slippers all year round and whose every food contains 15% dog hair, let me tell you: I KNOW CLASS.

The final matcha chocolate cake was delicious, sweet and grassy and elegant (disclaimer: see my standards above), and perfect to be enjoyed with or without children.

Oh, if you wonder about MiniBee: He had two slices and was happy as a clam. And so was I.


MATCHA CHOCOLATE CAKE

Ingredients

Chocolate Mixture
3/4 cups all-purpose flour
1/4 cup baking cocoa powder
3/4 tsp baking powder
1/4 tsp salt

Matcha Mixture
3/4 cups all-purpose flour
1 1/2 tbsp unsweetened matcha
3/4 tsp baking powder
1/4 tsp salt

Wet Ingredients
1 C sugar
1 stick unsalted butter at room temperature
2 eggs
3/4 C milk
1/2 C yogurt
1/2 tsp vanilla

Directions

  • Preheat oven to 325 degrees.
  • Grease and flour a 9'' springform pan. You can also line it with parchment paper if you prefer.
  • In a small bowl, whisk together the ingredients for the chocolate mixture.
  • In another small bowl, whisk together the ingredients for the matcha mixture.
  • In yet another bowl, cream the butter and sugar with an electric mixer, then add the rest of the wet ingredients.
  • Divide the wet ingredients evenly between the two flour mixtures, stirring until combined.
  • Pour the two mixtures into the pan. Bakerella suggests doing this in tablespoons to maintain the two colors vibrant. I poured half mixture at a time and then swirled them with my finger.
  • Bake for 45–50 minutes, or until a toothpick inserted in the center comes out clean.
  • Let rest of 10 minutes and dust with cocoa powder and powdered sugar.


Tuesday, February 17, 2015

VENICE CARNIVAL: FRITTELLE & GALANI

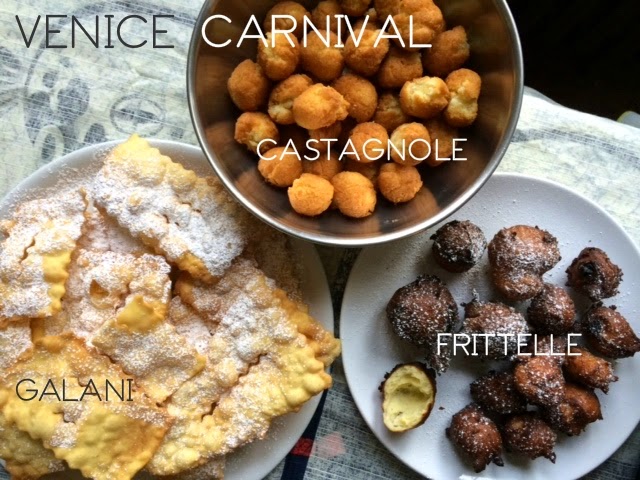
Trays with sweets typical of Venice Carnival: Frittelle, Galani e Castagnole
Today is Mardi Gras, which is the day of the year I traditionally spend sobbing in my pajamas because of homesickness. The reason? In Venice, today is the end of Carnevale ("Carnival" in English, if you seriously need a translation), my favorite celebration of all, and the one I miss the most since I've moved to the United States. Venice Carnival has been synonymous with great fun and great food since I was born. As a little girl, the fun consisted of wearing my chosen costume on multiple occasions—Venice Carnival lasts a little over two weeks—at school, on strolls around my town or in Venice, and at children's birthday parties. During each outing, us kids were allowed to throw confetti in each other's eyes and then litter the streets with colorful serpentine throws. To make things even more interesting, the right princess or pirate costume could grant you multiple fiancĂ©s by the age of 9. As a teenager and then young adult, the fun was pretty much the same, but it happened at night and was quite a bit boozier.

Now let's talk about the food. During Carnival, bakeries and pastry shops in Venice and the rest of the Veneto region start churning out an avalanche of amazing fried sweets, namely frittelle, galani, and castagnole. Venetians of all ages stuff their faces with these beloved sweets at all hours of the day. Let's see them in detail:

  • Frittelle are little sweet and soft doughnuts with raisins and pine nuts and sometimes filled with crema pasticcera (pastry cream) or zabaione, and dusted in granulated or powdered sugar. They are the Holy Grail of Venice Carnival foods.
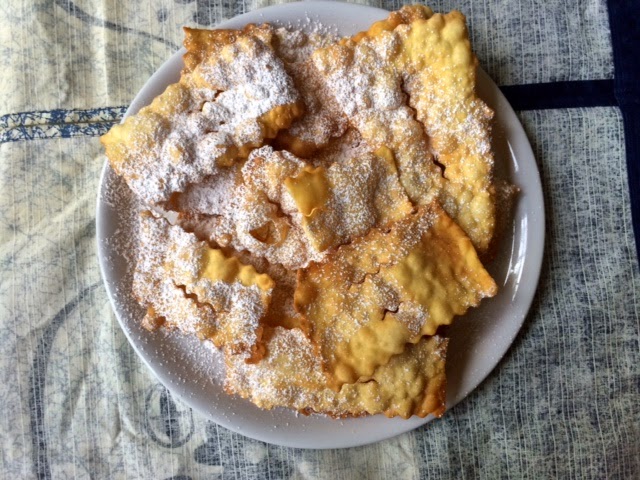
  • Galani are paper-thin rectangles of lightly sweetened dough, deep-fried and dusted with powdered sugar.
  • Castagnole are small round fried cookies very similar to shortbread. For some reason, they are the least popular among Carnival sweets, even though they are completely delicious in their own right. I am afraid they are unfairly obscured by their high-performing cousins (a phenomenon I will now call "Unfair Eclipse Syndrome").

To lessen my desperate homesickness and to share a little of the joy of Venice Carnival with my insatiable children, a couple of years ago Mr Bee and I started to make all these sweets at home with acceptable results. This year, however, we knocked one out of the proverbial ballpark by finally landing two perfect recipes for frittelle and galani that I want to share with you today. Get a Carnival mask on, hang some streamers around your house, gather friends and love interests, and deep-fry these gems: This is the closest you're going to get to my beloved Venice Carnival.

You can read more information about the history of Venice Carnival in this post I wrote for Multicultural Kid Blogs

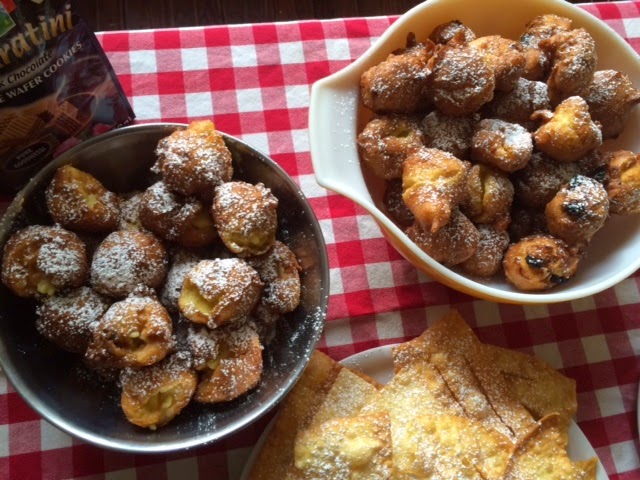
Venetian Carival Frittelle, with and without custard filling

FRITTELLE WITH CREMA

Makes 20–25 frittelle. Just remember crema is optional: Frittelle are amazing on their own.
Ingredients for crema pasticcera (pastry cream)
1/2 quart of milk (I would not use non-fat here)
lemon rind of half a lemon, cut in one piece (use a vegetable peeler)
4 egg yolks
1/2 cup sugar
1/4 cup cornstarch

Ingredients for frittelle

oil for frying
1 ¼ cups water
pinch of salt
4 tbsp unsalted butter
2 tbsp sugar (that's right)
1 ½ cups flour
6 eggs
orange rind (grated)
2 tsp vanilla extract
½ cup raisins
¼ pine nuts
oil for frying
granulated or powdered sugar for coating


Directions

Make the crema pasticcera
  • Pour the milk in a saucepan, add the lemon rind, and bring to a boil. Turn the heat off and let rest for 10 minutes.
  • In a bowl, whisk the egg yolk with the sugar together until pale yellow and fluffy.
  • Add the cornstarch to the egg mixture and stir together.
  • Remove the lemon rind from the milk, and pour the milk slowly into the egg mixture, stirring to prevent clumps.
  • Pour the mixture back into the saucepan and let it thicken on low-medium heat until it reaches a creamy consistency. The crema will continue to thicken, so leave it somewhat runny.
  • Let the crema cool down before using.

Make the frittelle
  • Place water, butter, salt, and sugar in a small pan and bring to a boil.
  • Add all the flour all at once and stir vigorously until the mixture pulls away from the sides of the pan to form a ball. This takes less than a minute.
  • Let the dough cool, then add one egg at a time. Make sure each egg is incorporated into the dough before adding another one. (I’d use a electric mixer here, if possible. Unless you enjoy the arm workout, of course.)
  • Mix in the the rest of the ingredients.
  • Heat oil to 370F degrees and fry the dough in small balls (use two spoons) for 5–6 minutes, or until golden brown and cooked throughout. Note that frittelle will first puff a little and then puff up even more after a couple of minutes of more.
  • Roll frittelle into granulated sugar or dust with powdered sugar.
  • When cool, fill the frittelle with about a tablespoon of crema pasticcera each, depending on size. I used a whipped-cream syringe similar to this one but way crappier. If you don't have a syringe, I guess that you can cut the frittelle open and fill them with a tablespoon of cream.
*The usual optimal frying temperature is 375F, but that cooked our dough too quickly so it was burned on the outside and still raw on the inside. Five degrees made all the difference!

A tray filled with Venetian Carnival Galani


GALANI
Ingredients

oil for frying

4 eggs
4 cups flour
2 tbsp butter, softened
1/2 cup sugar
1 cup sparkling water
grated lemon rind from one lemon
a pinch of salt
2 tbsp grappa (optional)
2 tsp vanilla extract

Directions


  • Mix the flour, sugar, and butter together until coarsely combined. You might want to use an electric mixer for this part, otherwise use your hands and be quick.
  • Add the eggs, lemon rind, and salt, Grappa and vanilla and mix.
  • Add sparkling water as needed and a little at a time until the dough becomes soft and stretchy. It should resemble fresh pasta dough, if that helps.
  • Cover the dough and let it rest for an hour.
  • Roll out the dough with a roller (champion) or with a pasta machine, going up to the smallest setting so that galani are paper-thin. If you've never used a pasta machine before, check out these instructions.
  • Cut dough into large rectangles with a pasta cutter. (Parents of young children: I couldn't find mine once so I used a Play-doh cutter.) Rectangles should be about 2x4'', but can be VERY irregular, so don't worry too much about it. 
  • Place rectangles on a floured kitchen towel.
  • Fry the galani in 375 degree oil for a few seconds, or until slightly colored and puffed up. 
  • Let rest on paper towels and dust with powdered sugar. Galani last beautifully for 2–3 days in a dry climate.


Wednesday, February 4, 2015

COFFEE LOVE

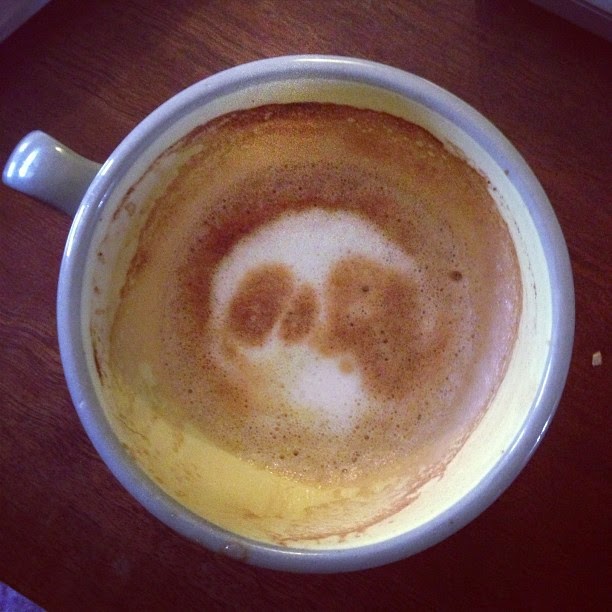
Espresso cup where the froth looks like a skull
What is Mr Bee's espresso trying to tell me?
Sorry people, I've been busy with kids and work recently, and my Hotpoint stove died for good last week, so I have neither blog-post ideas nor Instagrammable food (unless you really want to see the calzone I ordered yesterday for delivery). So I've taken an old post from Italian Dead Chef, vintage 2006, about opening your heart to the person you love. Spoiler alert: DON'T.

I moved in with Mr Bee almost three years ago. When I first I came over, on a sweltering hot June day, I brought only one piece of luggage for three months. In that bag, I carried the minimum necessary amount of clothing for a Washington summer and a immigrant-family-size stockpile of Italian food such as Gragnano pasta, fresh ravioli, dried porcini mushroom, hunks of Parmigiano Reggiano (crustless, from the heart of the wheel), frozen home-made pesto, and coffee. In those three months, I committed to preparing daily and irresistible Italian meals, flaunting a continental nonchalance that Mr Bee could simply not resist.

But my little secrets and cute cooking tips did not last long. My American student was more curious and eager than I hoped, and within a year he had unveiled my bottomless ignorance in the kitchen. Who betrayed me? Coffee.


The Bialetti family
When I arrived in DC with a Bialetti stovetop coffee maker and four packages of Lavazza QualitĂ  Oro ground coffee beans, it was easy to seduce Mr Bee, who had almost never had a coffee in his life. Unfortunately, the initial dose was so addictive that Mr Bee soon developed an obsession for espresso, a subject I know... well... NOTHING ABOUT. Sure, I drink espresso in Italy all the time, but ask me about how to do it, and I will deftly change subject.

Since Mr Bee was introduced to Italian coffee,  his love for the Arabica bean has exploded in the following purchases: a vintage Gaggia espresso machine, a burr coffee grinder (no blades, are you crazy?), a 4-lbs package of original whole coffee beans from the famed coffee shop Sant'Eustachio in Rome, two heavy-duty tampers, two metal pitchers for frothing milk, a knock box, set of two-ounces thick porcelain espresso cups, and a barista manual written by a visionary alchemist from Seattle who is considered the true prophet of espresso in America. Needless to say, we put my Bialetti aside and switched to fabulous morning espresso.

All this makes me really happy, of course, because the espresso I now drink at home is very high-quality and comes in a pre-heated cup. The problem arises when, in a hurry early in the morning, I dare make my own.


At whatever ungodly hour of the morning I decide to have my espresso, Mr Bee appears in the exact moment I try in vain to press the coffee into the handle, and balks in terror. The reason? I'm not pressing hard enough. Personally, at 6 in the morning (and also at 7, 8, 9, and 10), I can't even make a fist, so you can very well imagine how hard it is for me to apply 40 lbs of pressure to the portafilter. When the coffee finally drips inside my cup, too quick or too liquid, Mr Bee shakes his head with the most heartbreaking sadness: if I had to waste the good coffee imported from Italy, could I at least ask him to prepare it? He's almost about to leave me alone, when he notices that the crema on my coffee is too pale, a sure sign that the water was not hot enough, or that the coffee had not been pressed uniformly or vigorously enough. God helps us all when I add my teaspoon of sugar! Sugar in my coffee is the epitaph of my coffee disaster.

So I can't help thinking back about those days, a long time ago, when I would smile at Mr Bee and show him how much coffee you put inside you stovetop coffee pot, and how you can make a quick crema by whisking a little coffee and sugar together with a teaspoon. His eyes were wide open with wonder, and I felt like proud and generous ambassador of a wonderful heritage. Now that Mr Bee has unveiled my cheap kitchen tricks and my botched, sub-par Italian coffee, I wish I had kept a few tricks for myself. Damn Italian hospitality.